![]()
All product names, logos, and brands used in this post are property of their respective owners.
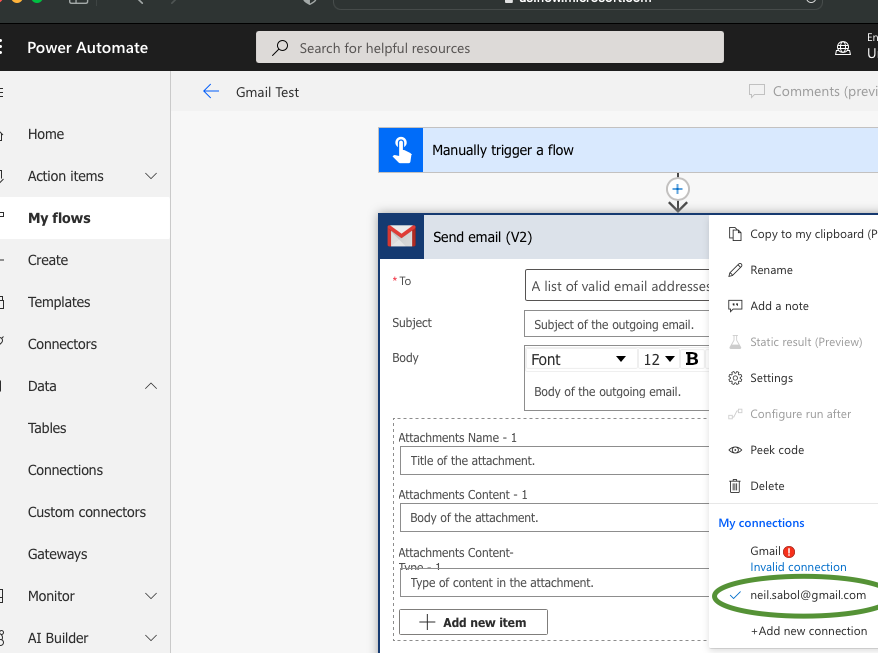
In my last post, I wrote about strange Gmail behaviors in Power Automate. The behavior manifests in flows that use the Gmail connector with the “default shared application” connection method instead of the “bring your own application” method.
Part of the fix involved configuring the Gmail API in the APIs & Services area of the Google Cloud Platform console. In this post, I will provide step-by-step guidance for configuring the Gmail API with the “bring your own application” connection method for the Power Automate Gmail connector.
Google API setup
The bulk of the configuration occurs in Google’s APIs & Services Console. This process ultimately results in a Client ID and Client Secret that you add to the Gmail connector (bring your own application) in Power Automate.
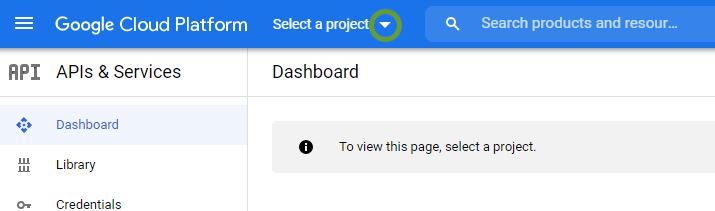
Browse to the APIs & Services Console and select a country/approve the terms if you have not already.
Click the dropdown next to your project list. If you have no projects, it is labeled Select a project. If you have existing projects, the label reflects the name of the currently selected project.
Click New project near the top right of the Select a project dialogue.
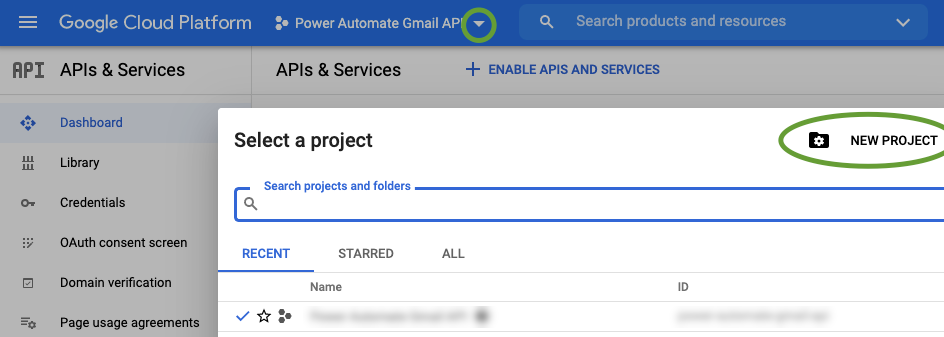
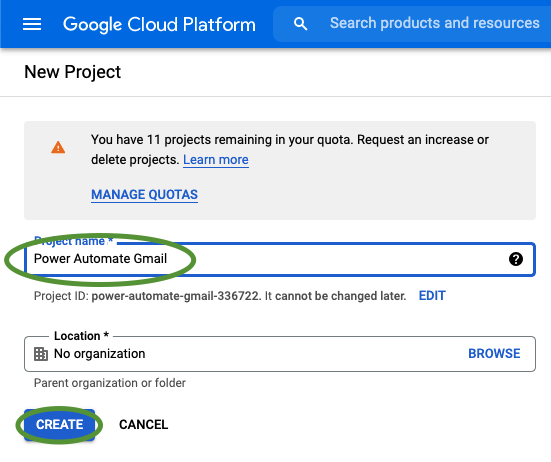
Provide a descriptive name for the project, and click Create. On the resulting screen, select the project you just created.

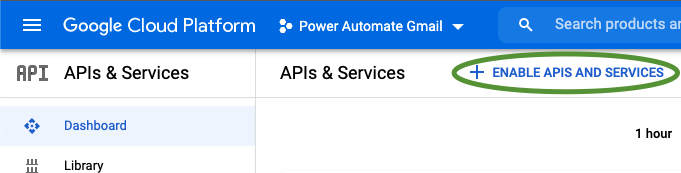
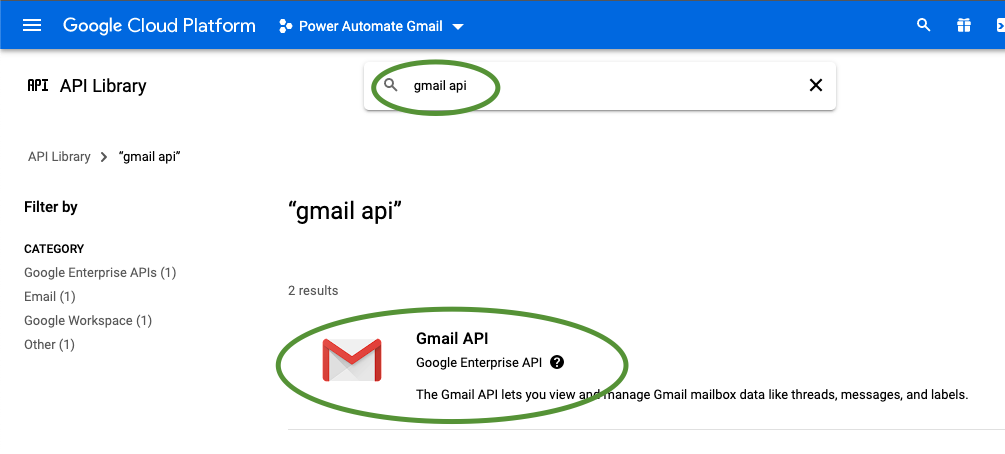
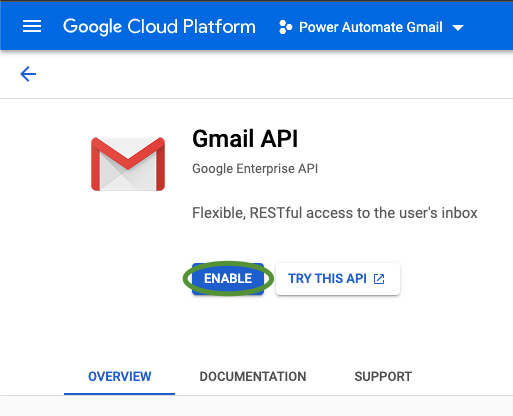
Click Enable APIs and Services, then search for “Gmail api.” Select Gmail API from the search results list. On the next screen click the Enable button to add the Gmail API to your project.
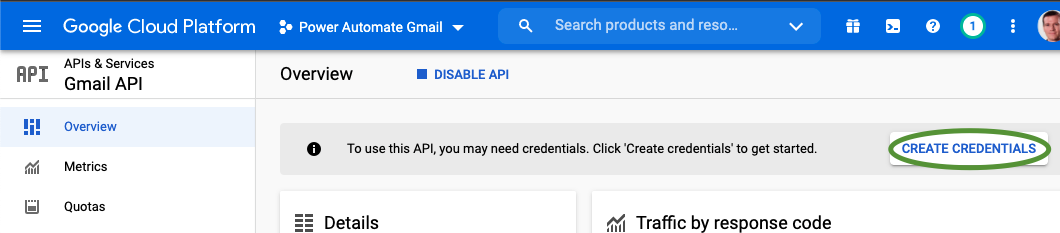
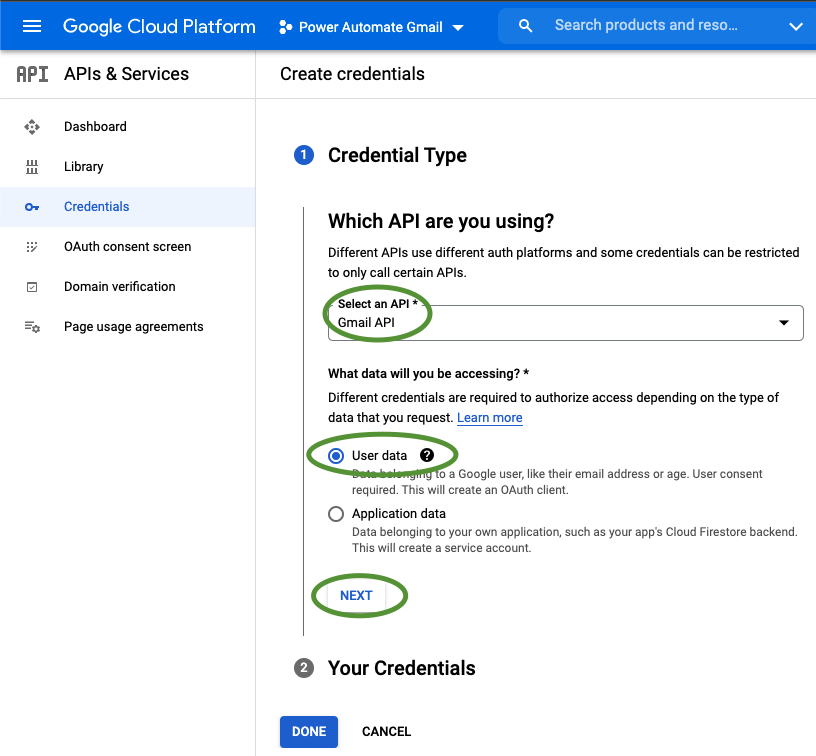
Click Create Credentials on the next screen to set up OAUTH2 authentication for the Gmail API. These credentials are synonymous with the Client ID and Secret you will add to the Power Automate Gmail connector later.
For Credential Type, select Gmail API and User data, then click Next.
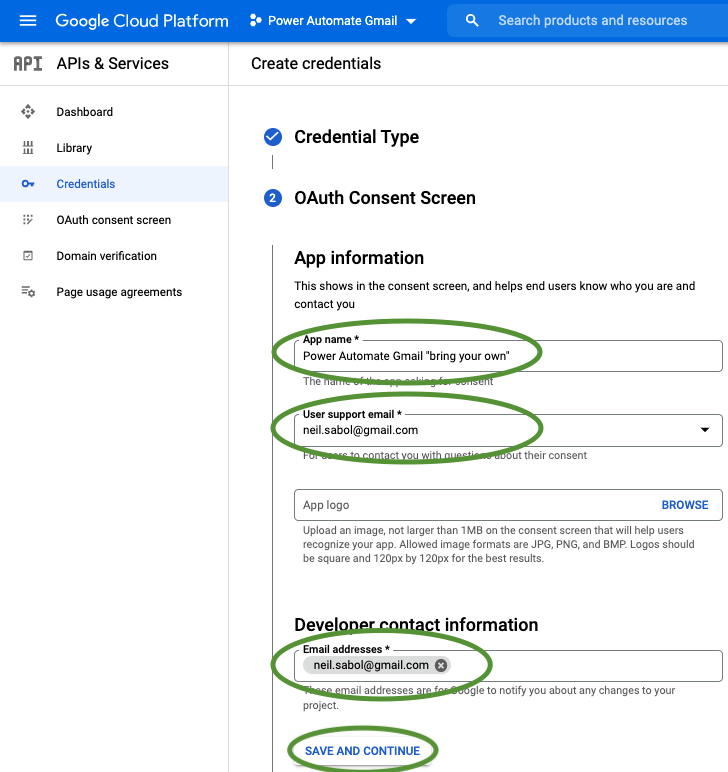
For App information, provide a descriptive name for the application and your email address (twice). Then, click Save and Continue.
For Scopes, click Add or Remove Scopes, search for “Gmail API,” and select the
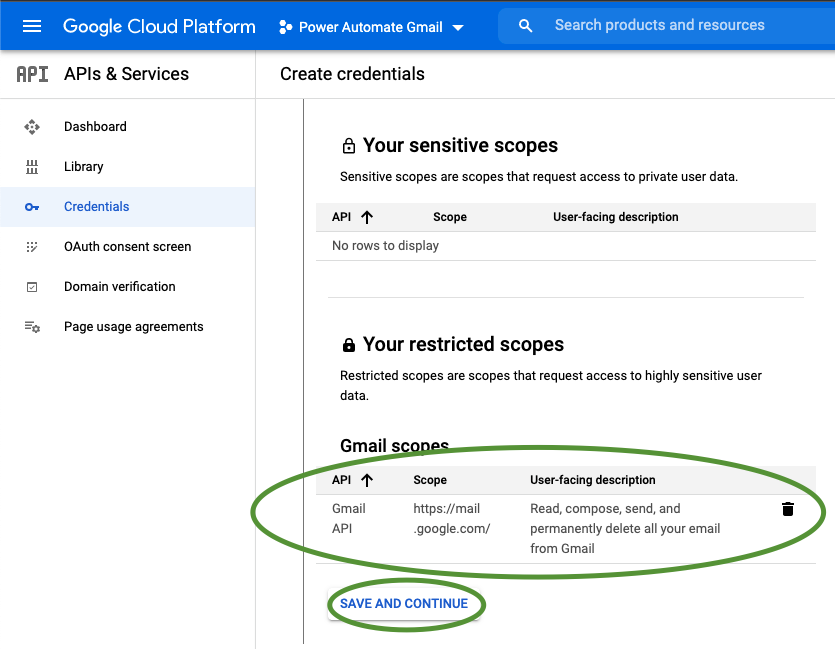
https://mail.google.comscope (provides full access to Gmail content). Alternatively, if you do not require full access for your flow, you can choose a less permissive combination of scopes. Finally, click Update near the bottom of the window. Once done, the scope(s) you selected should appear under Your restricted scopes area. Click Save and Continue.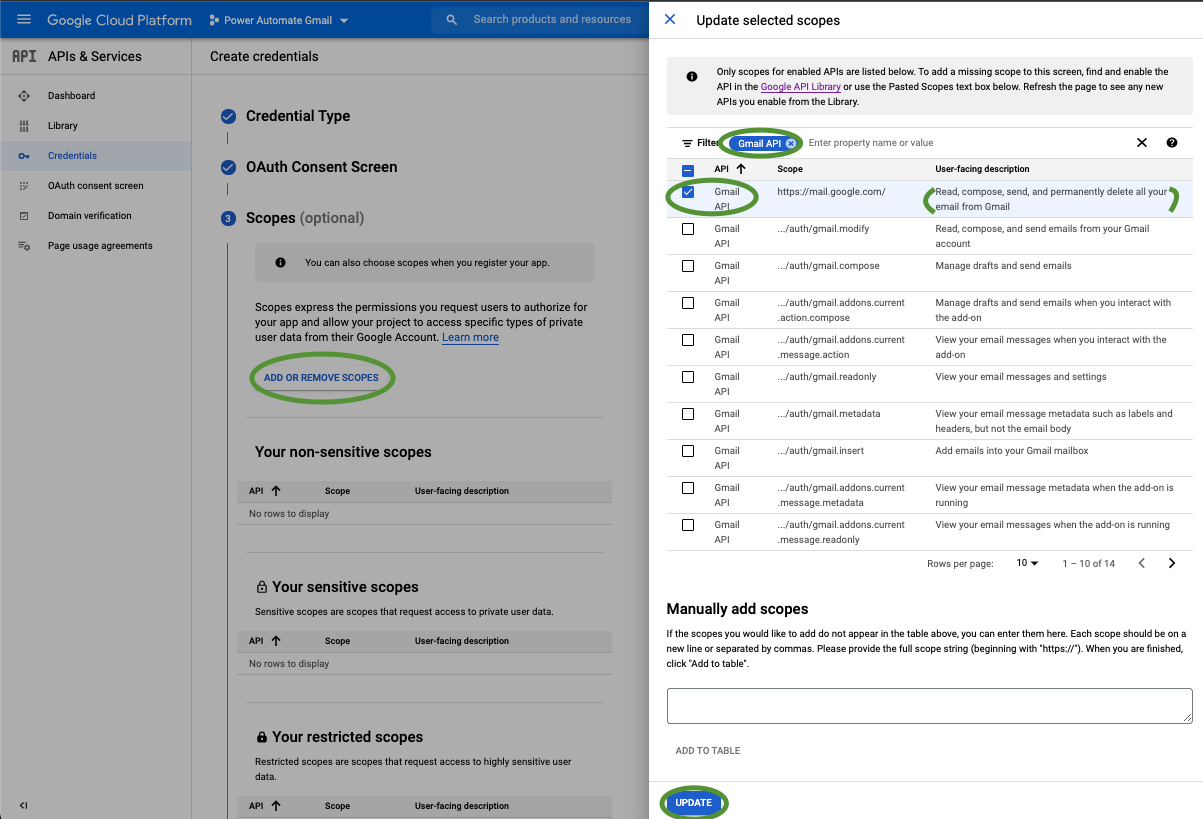
For OAuth Client ID, select Web application from the dropdown, provide a descriptive name, click Add URI (under Authorized redirect URIs), and paste the following URI:
https://global.consent.azure-apim.net/redirect/gmail(to be safe, you may also want to add this URI:https://global.consent.azure-apim.net/redirect)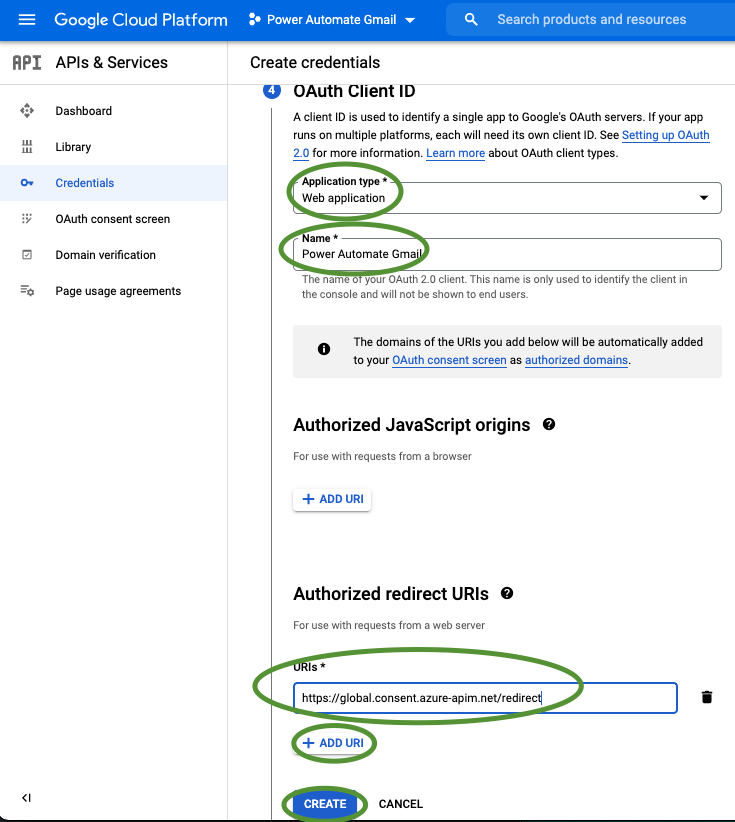
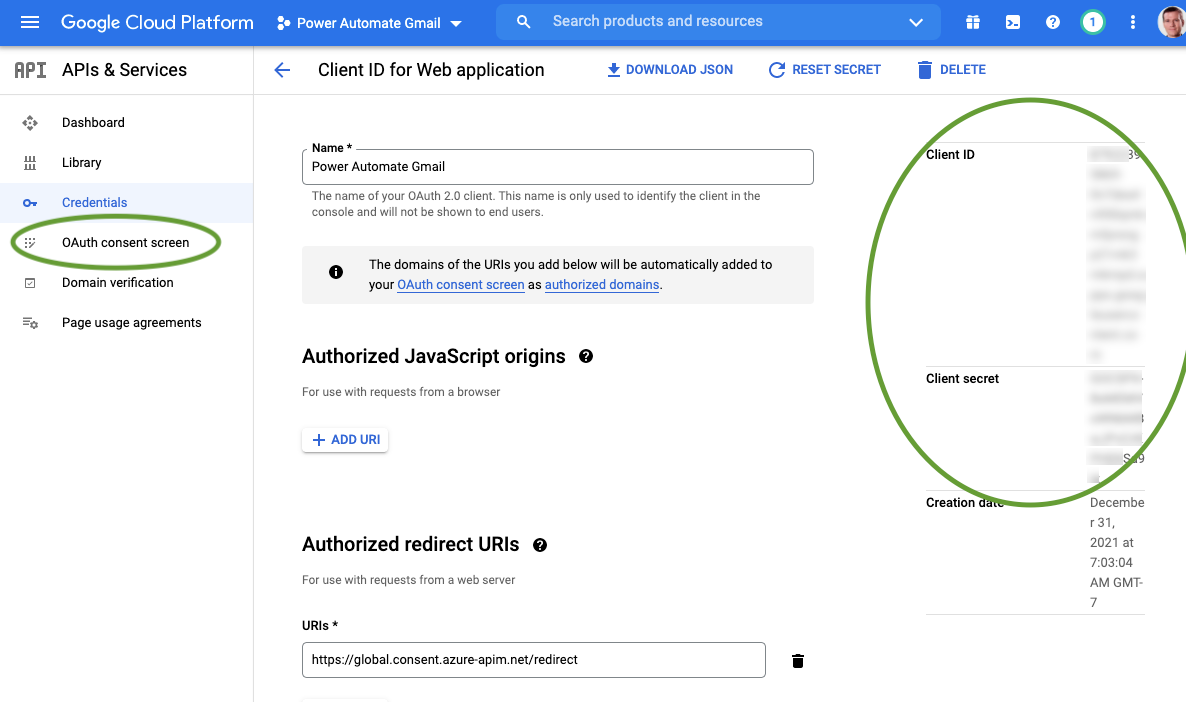
For Your Credentials, click Done. In my experience, it is easier to skip downloading the Client ID and secret until later.

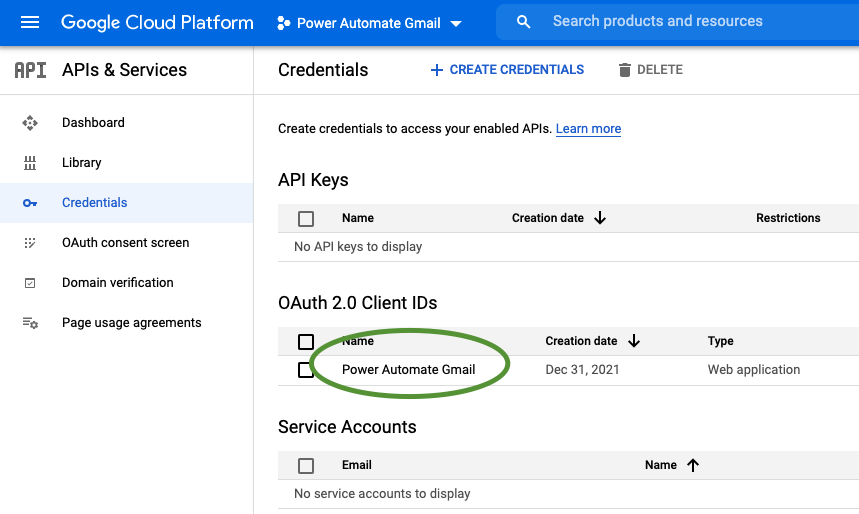
On the Credentials screen, click the name of the OAuth 2.0 Client ID you just created.
Take note of the Client ID and Client secret on the right side of the screen. You will later add these into the Gmail connector in Power Automate. Once done, click the OAuth consent screen link on the left side of the screen.
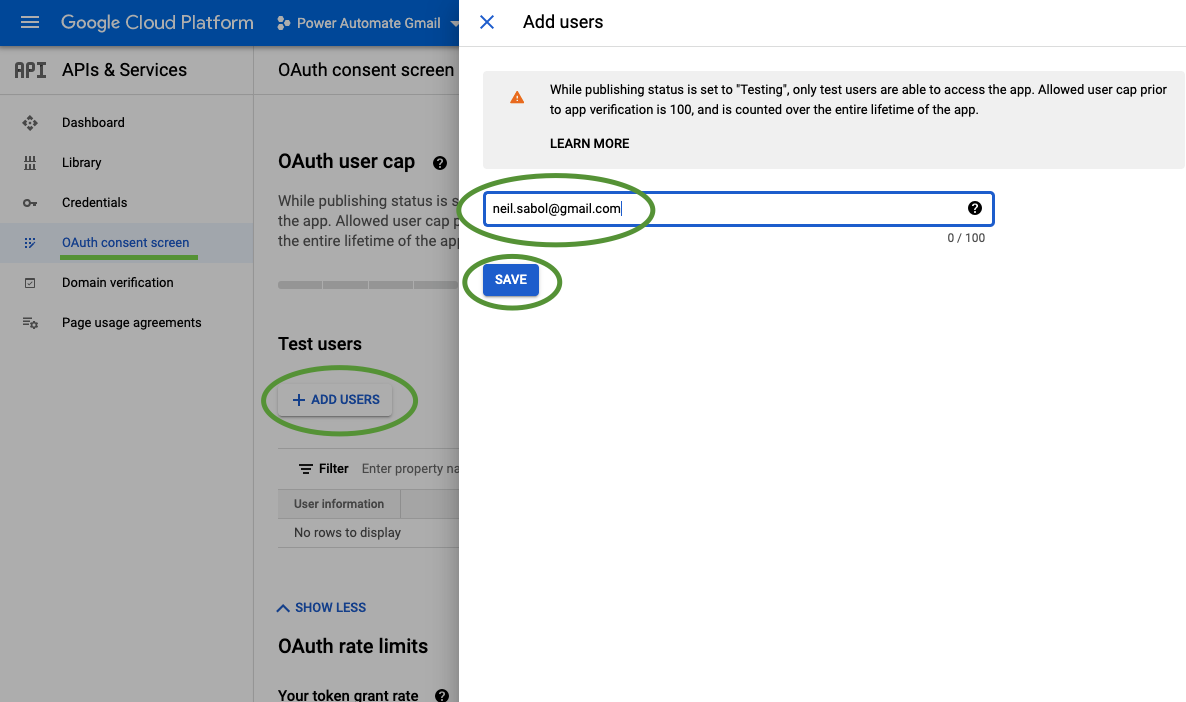
On the OAuth consent screen page, the publishing status should be Testing. Scroll down to the Test users section and click Add users. In the Add users panel, type the email address(es) of the Gmail account(s) you want to access using the Gmail connector in Power Automate. In this example, I specified my own Gmail email address. Once done, click Save.
Power Automate setup
The Power Automate configuration of the Gmail connector is straightforward. It is a matter of adding the details (Client ID and secret) of the new project (application) from the Google Console into the connector, then authenticating with your test user(s).
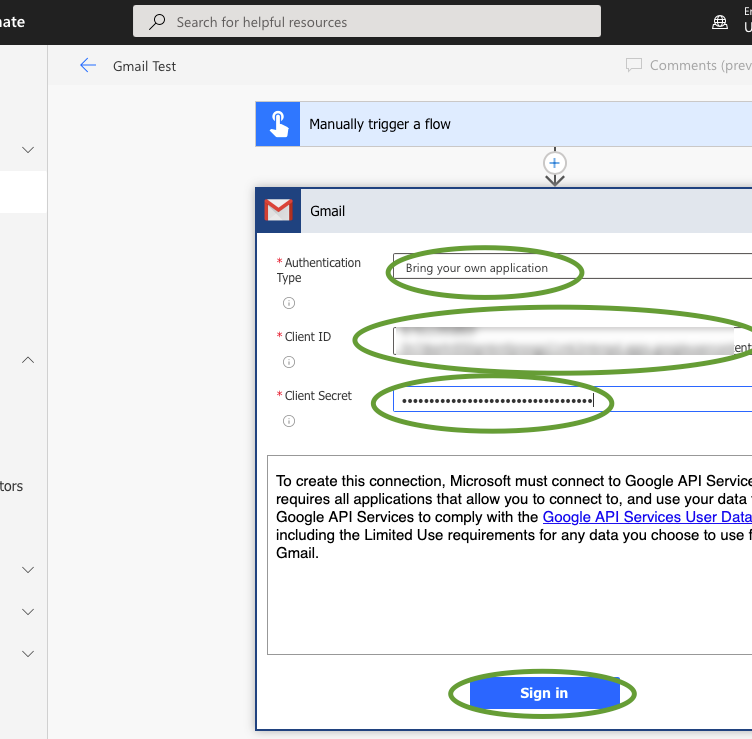
Browse to Power Automate, and add a new Gmail action (or connector) to your flow. Select “Bring your own application” for Authentication Type, then paste the Client ID and Client Secret from step 13. Once done, click Sign in.
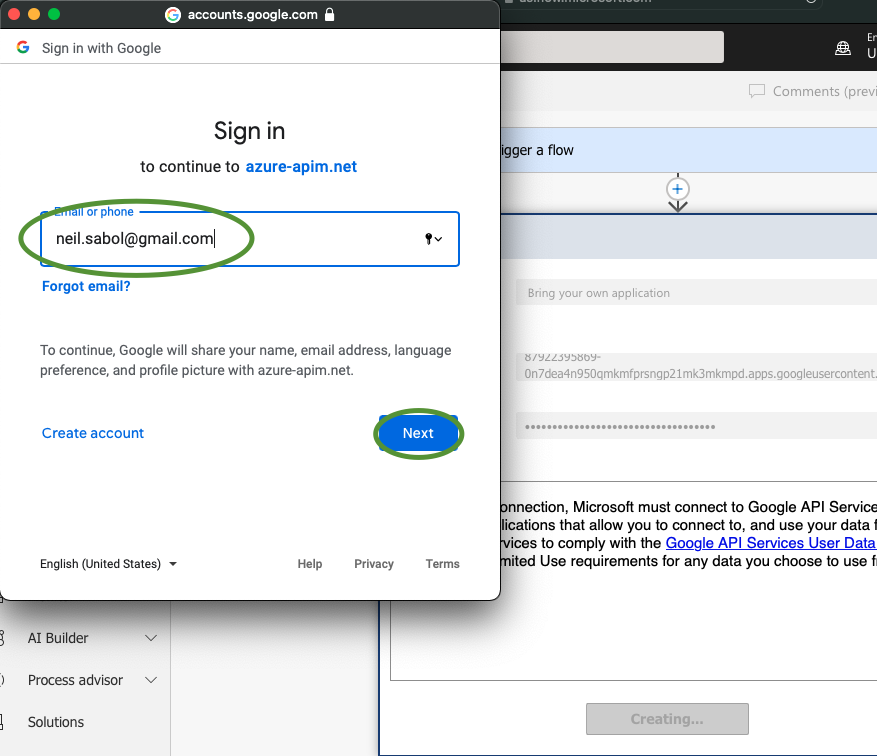
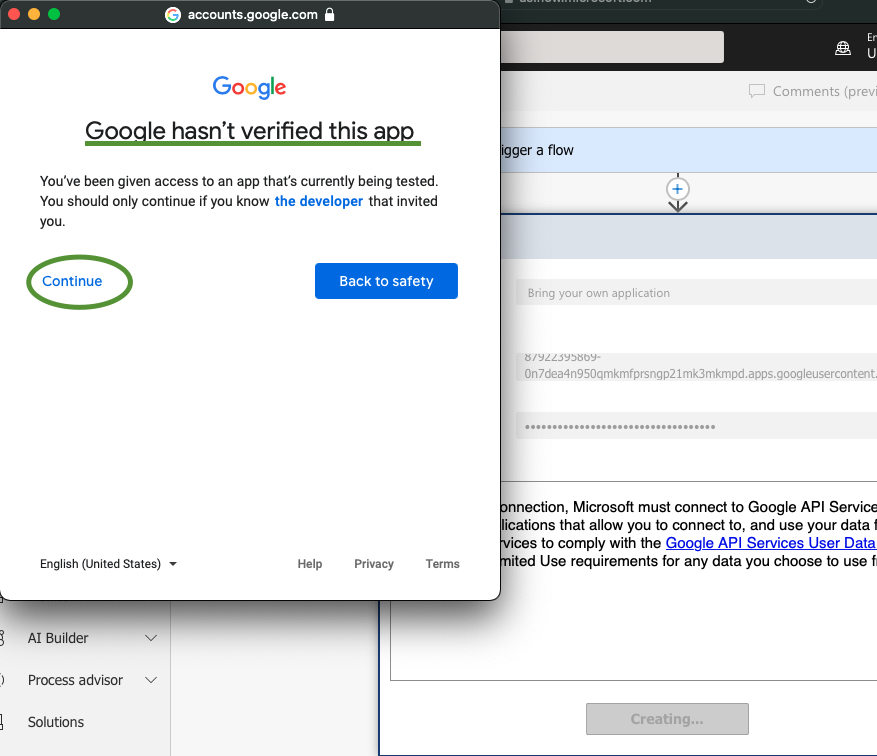
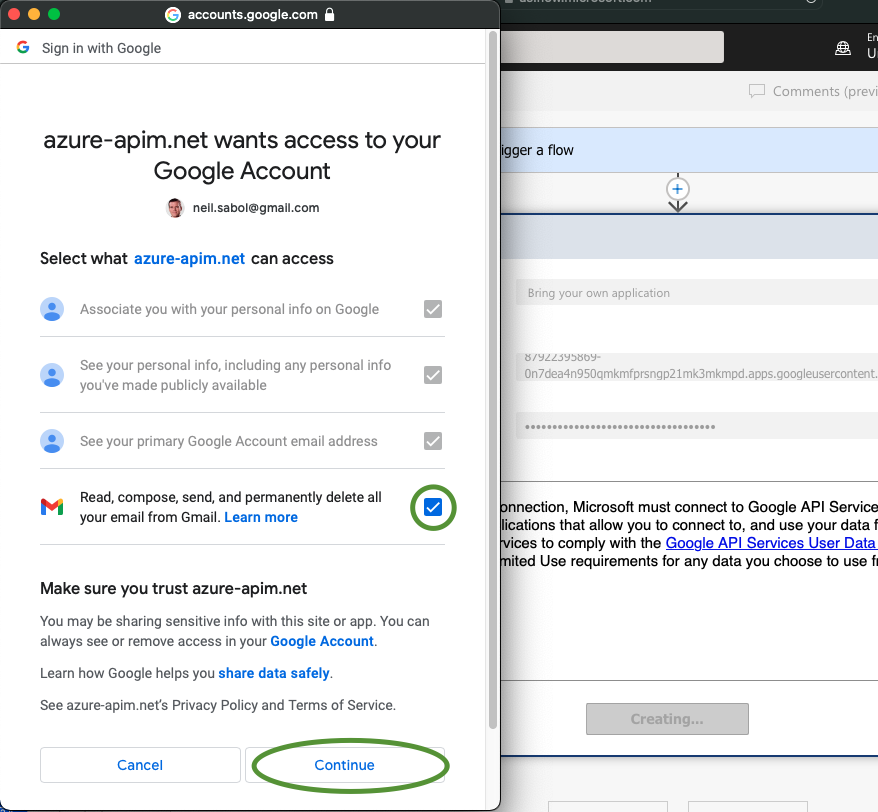
When the Google Sign in screen appears, log in as one of the test user(s) you added in step 14. In this case, I used my own Google account (Gmail email address). On the Google hasn’t verified this app screen, click Continue. Finally, check the Read, compose, send, and permanently delete all your email from Gmail box on the consent screen and click Continue.
Done
These steps should result in a successfully authenticated Gmail connector in your flow (using the “Bring your own application” authentication method). Note, when you add connections in this manner Power Automate names them after the Google (Gmail) account used during authentication.